About This Project
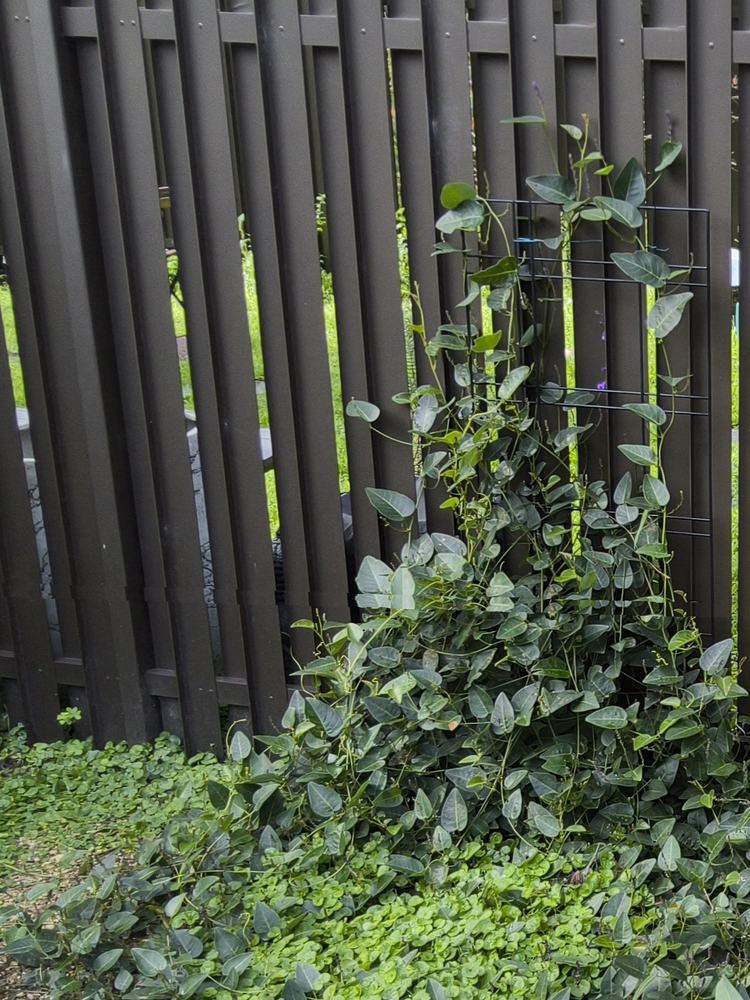
The client had an old timber deck she wanted replaced, and room to extend it, but not if it meant losing the garden that makes the space feel like home. She also had an established Hardenbergia (Happy Wanderer) growing up a small black plastic frame on the fence. She wanted to keep it, and she wanted it to have something better to grow on that sat no higher than the fence line.
We worked through the layout with her until the balance was right: enough new deck to properly use, and enough garden left to keep it feeling green. For the Hardenbergia we proposed trellis wire strung between two cypress posts, so it can spread out and form a green wall over time. Then we lifted the old boards and found a problem we see far too often.
Build Stages — Full Documentation
Stage 0
The Original Deck
01
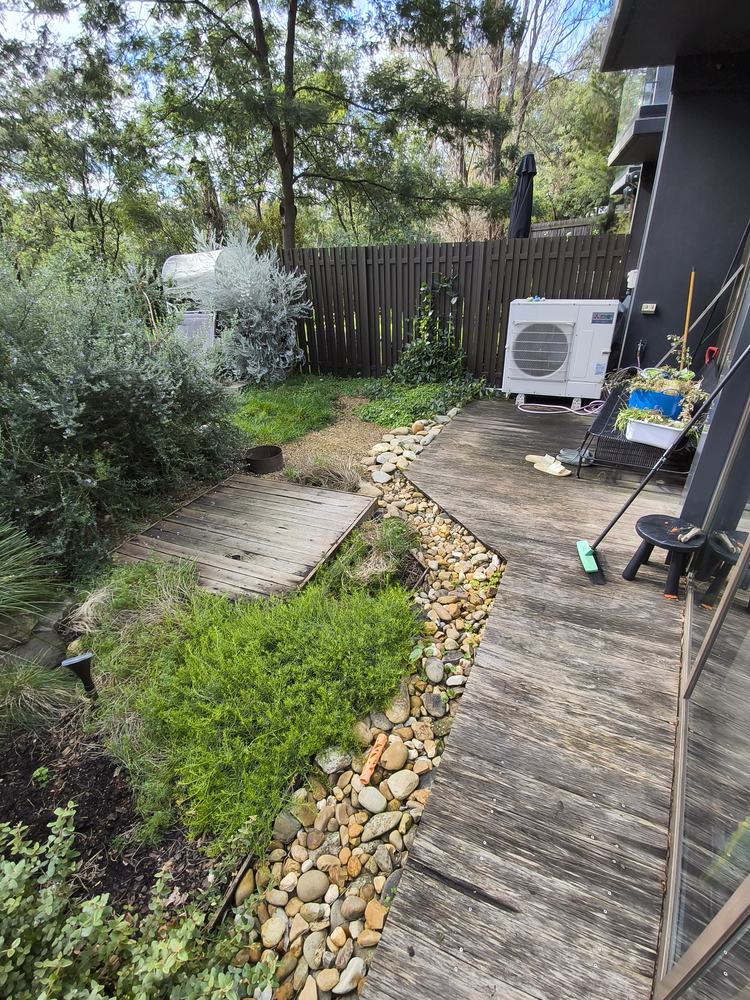
The site at the start. A weathered timber deck ran along the house, with a separate raised boardwalk out in the garden and a river-stone channel between them. It was usable, but tired, and cut off from the garden around it.
02
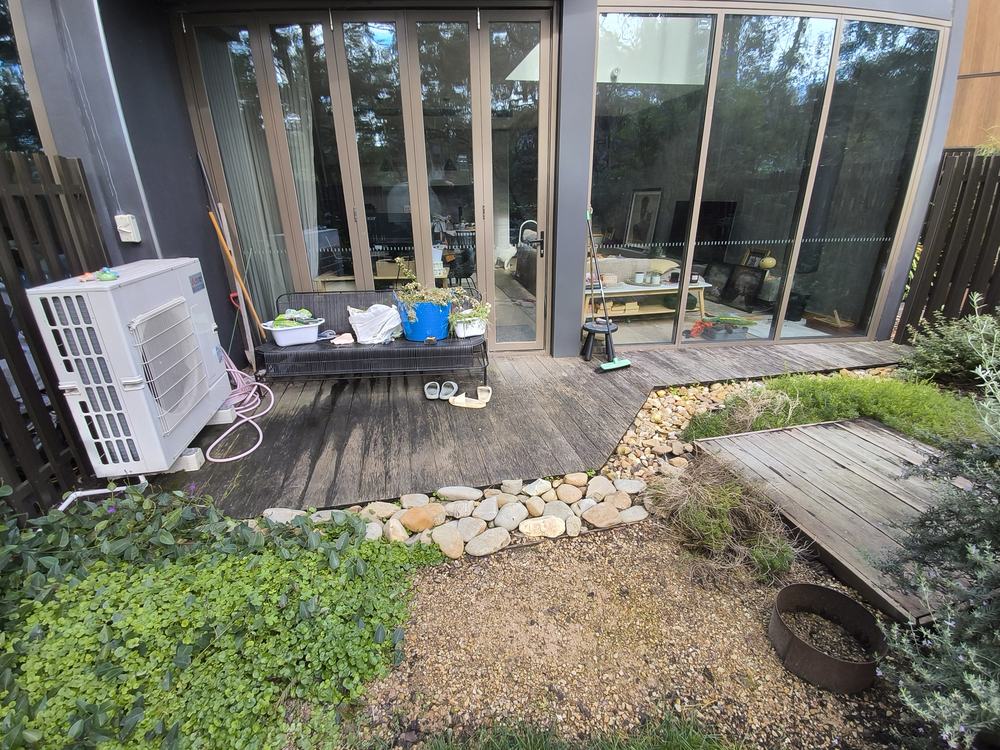
Looking back toward the house. The old deck sat low against the glass doors, with greyed, splitting timber, and the garden side of the yard added very little to the space.
03
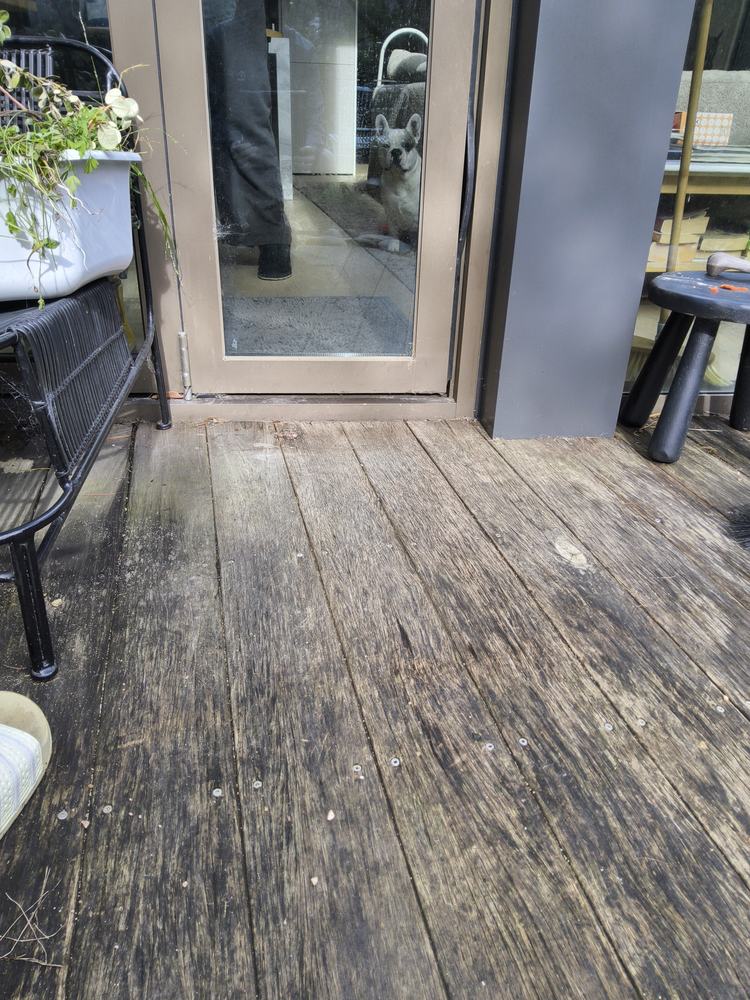
The deck at the doorway: weathered boards and open gaps. It also wasn't sitting flush with the door step, which we confirmed once the boards came up.
04
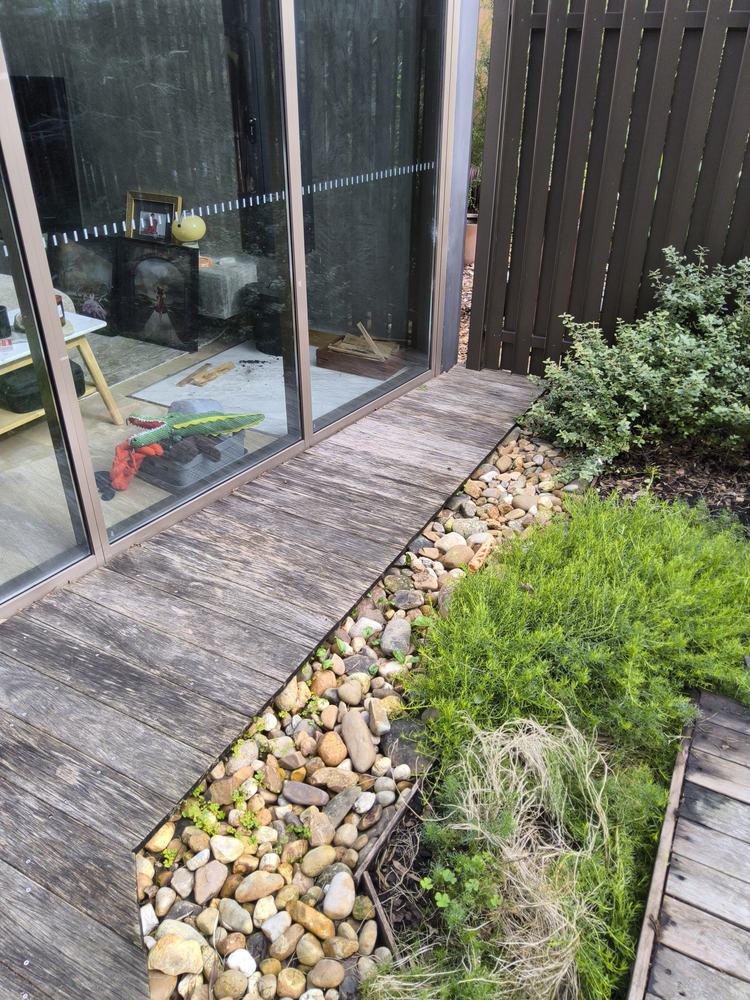
The narrow strip of deck alongside the glass, with the river-stone channel and garden bed beside it. This section would be rebuilt as part of one continuous deck.
05
The client's established Hardenbergia (Happy Wanderer), trained up a small black plastic frame on the fence. She wanted to keep it and give it something better to grow on, no higher than the fence.
Stage 1
What We Found Under the Boards
06
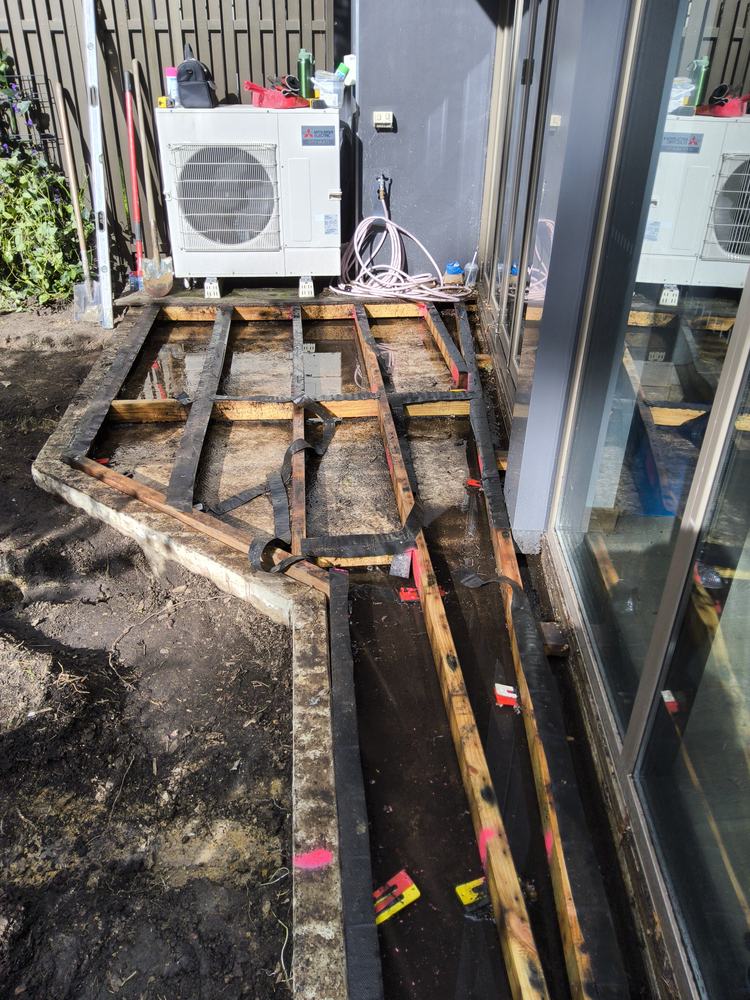
With the boards off, the real problem was exposed. The frame wasn't fixed down at all. It was just wedged in between the concrete, with packers underneath to keep the timber off the slab and out of the wet. The levels were out across the whole frame, and worse in some places than others.
Stage 2
Securing & Relevelling the Existing Frame
07
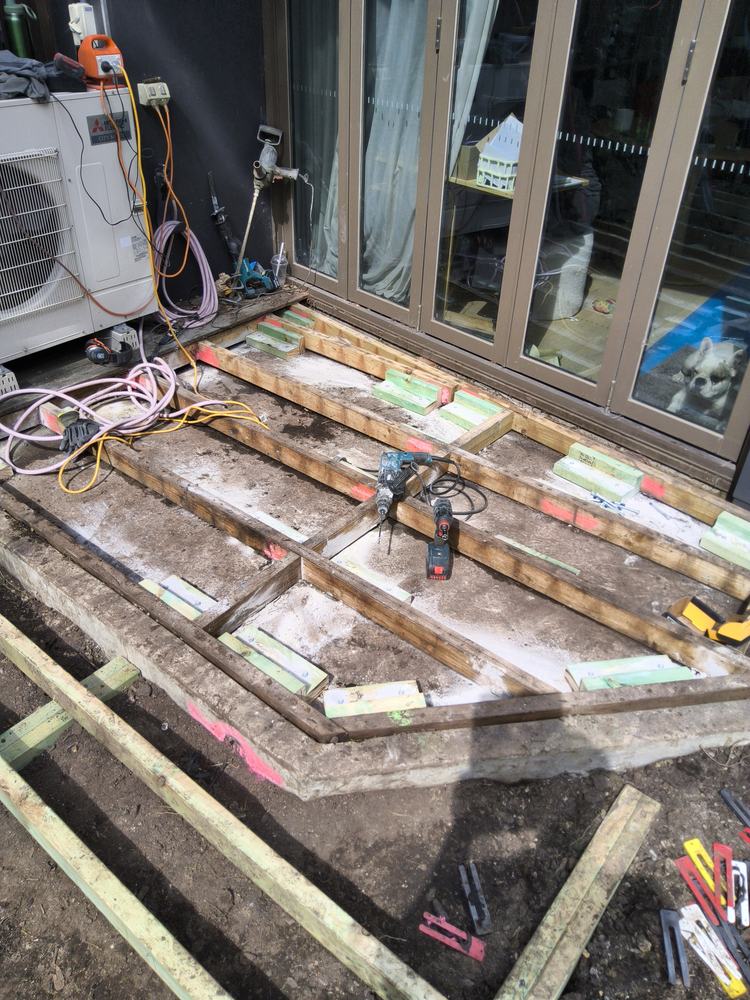
Noggins dynabolted to the concrete base. We lifted each joist until it was dead level, then fixed it down into the noggin below, so the frame is now held in place instead of just wedged. We lifted and relevelled every part of the existing frame this way, which also brought the finished deck flush with the door step.
Stage 3
Stumps & Frame for the Extension
08
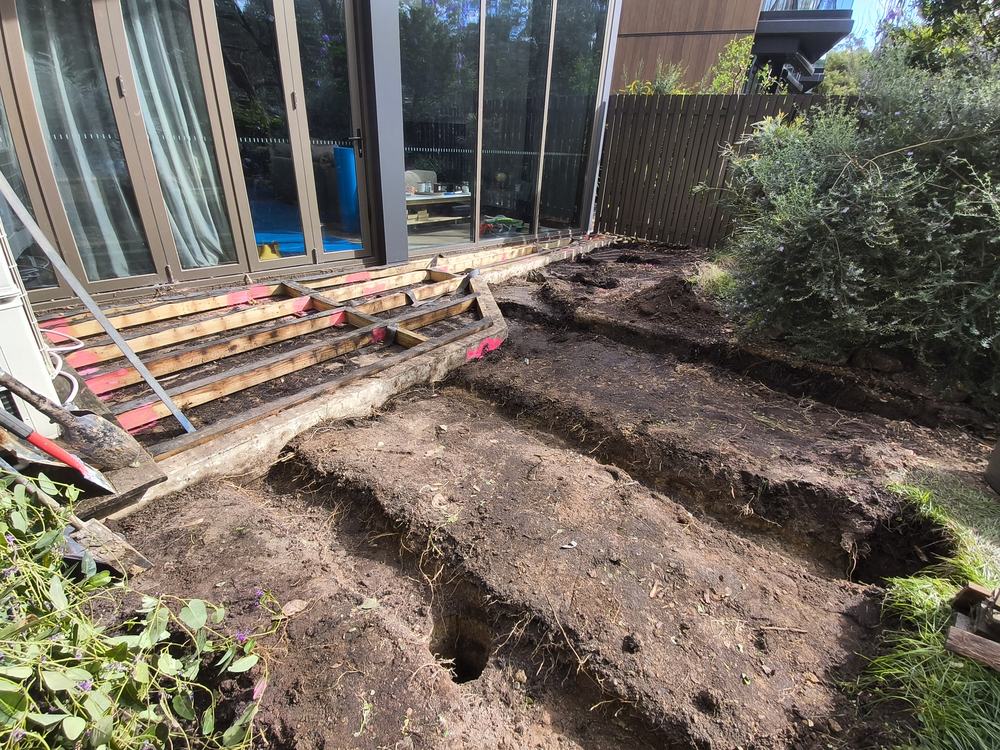
Stump holes and trenches dug for the extension frame. The old frame is visible alongside the house, stripped back and ready to be relevelled.
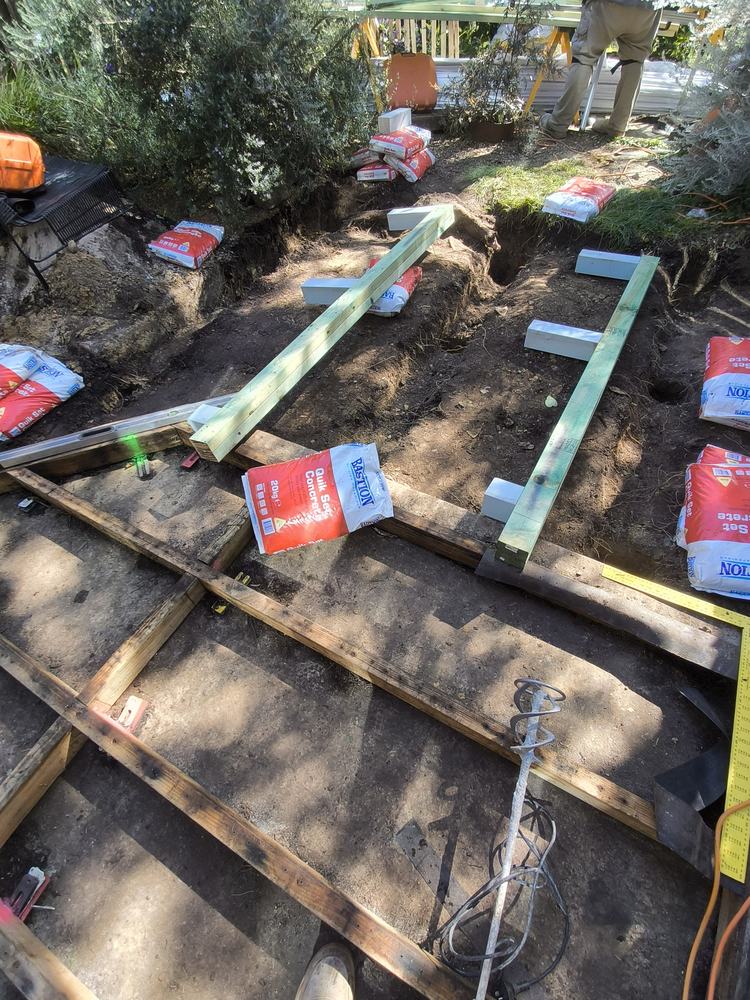
09
Stumps set out and ready for concrete, each one positioned to support the new frame.
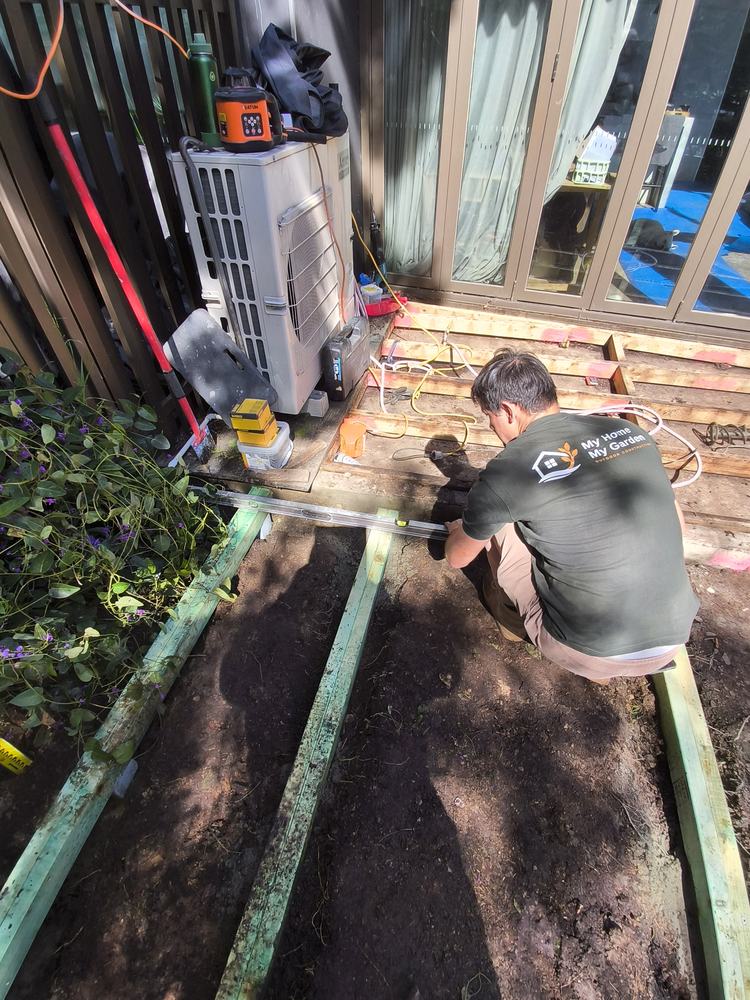
10
Tying the new frame into the existing one. We checked every joist with a level where the two frames meet, so there's no step or dip where the old deck ends and the extension begins.
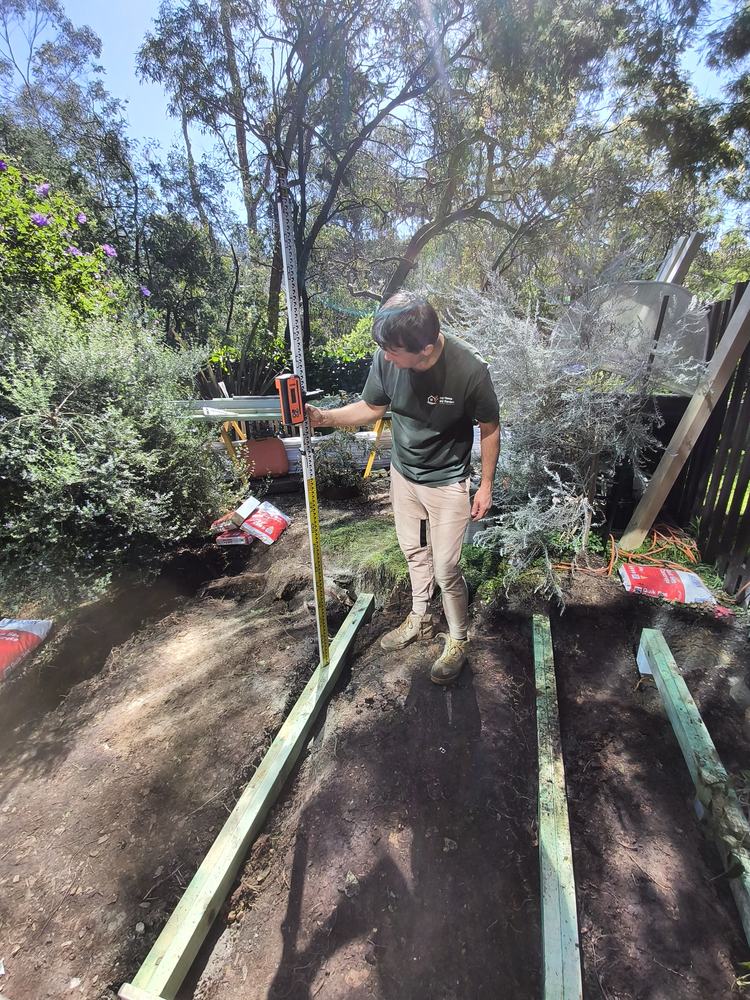
11
Laser-levelling while the concrete went in. We checked each stump against the laser and adjusted it before the concrete set, so the extension sits dead level with the existing frame.
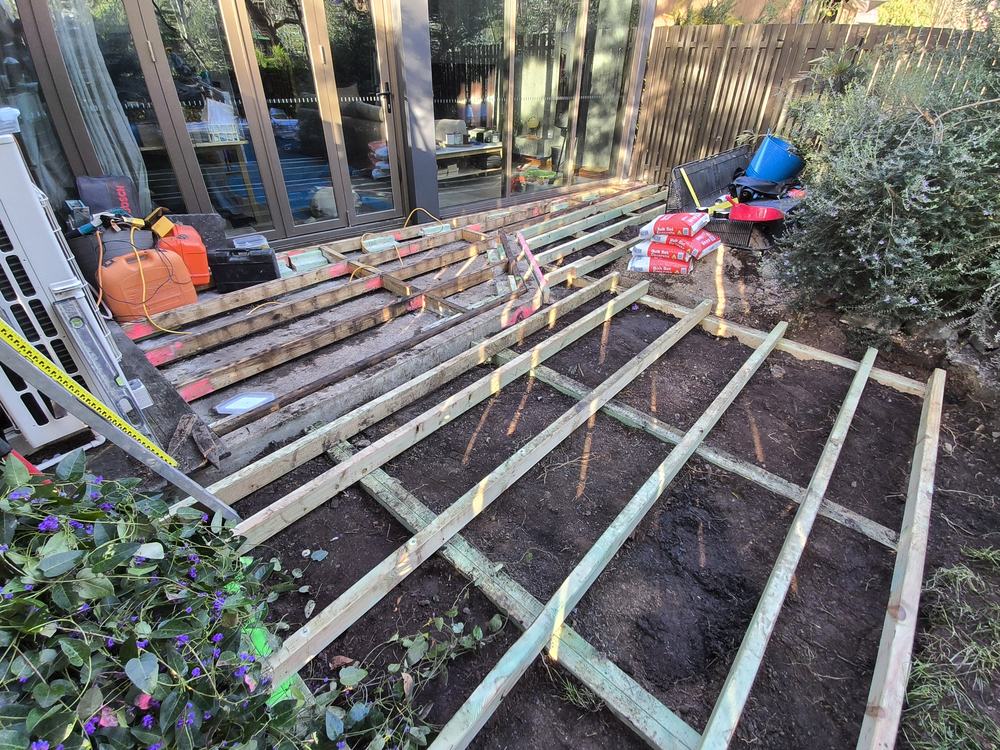
12
The extension frame complete, joined to the relevelled existing frame and running out into the garden.
Stage 4
Protecting the Frame
13
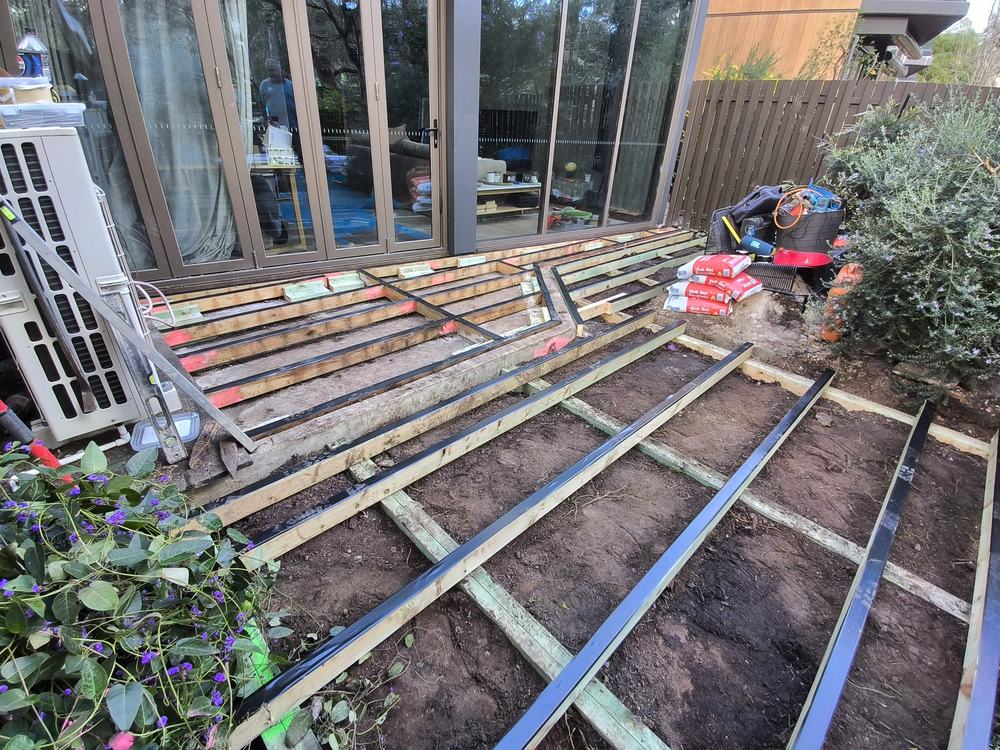
Joist protection tape along the top of every joist, on both the existing frame and the new extension. It keeps water off the timber where the boards and clips sit, which is where the damage usually starts.
14
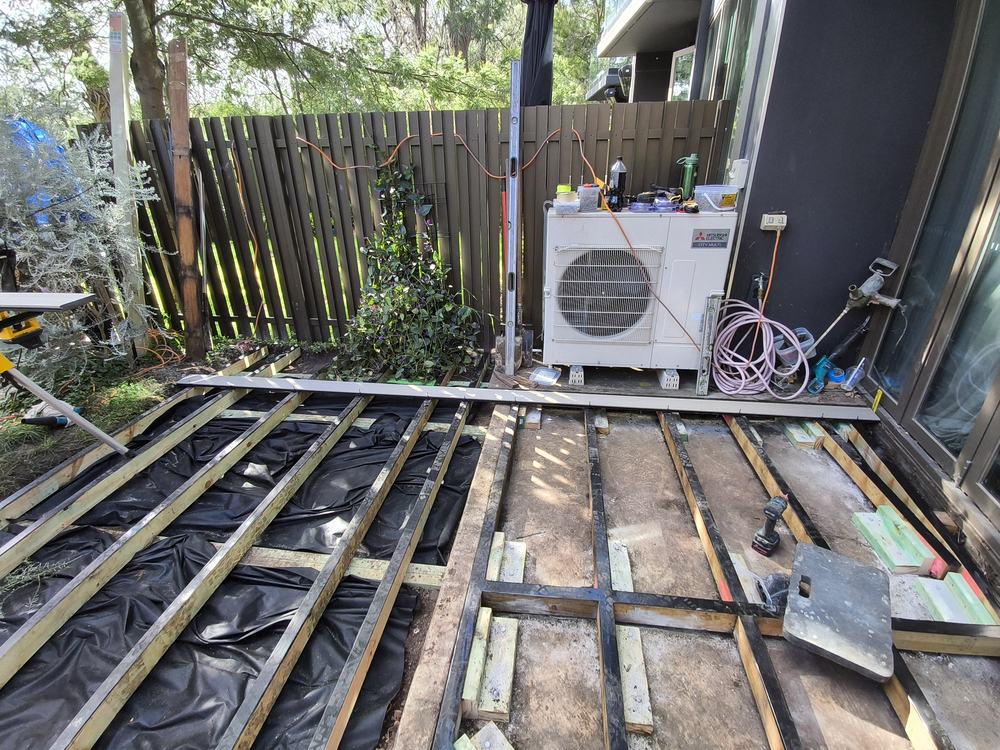
Weed mat laid under the new frame to stop growth coming up through the deck, with the taped joists running over the top.
15
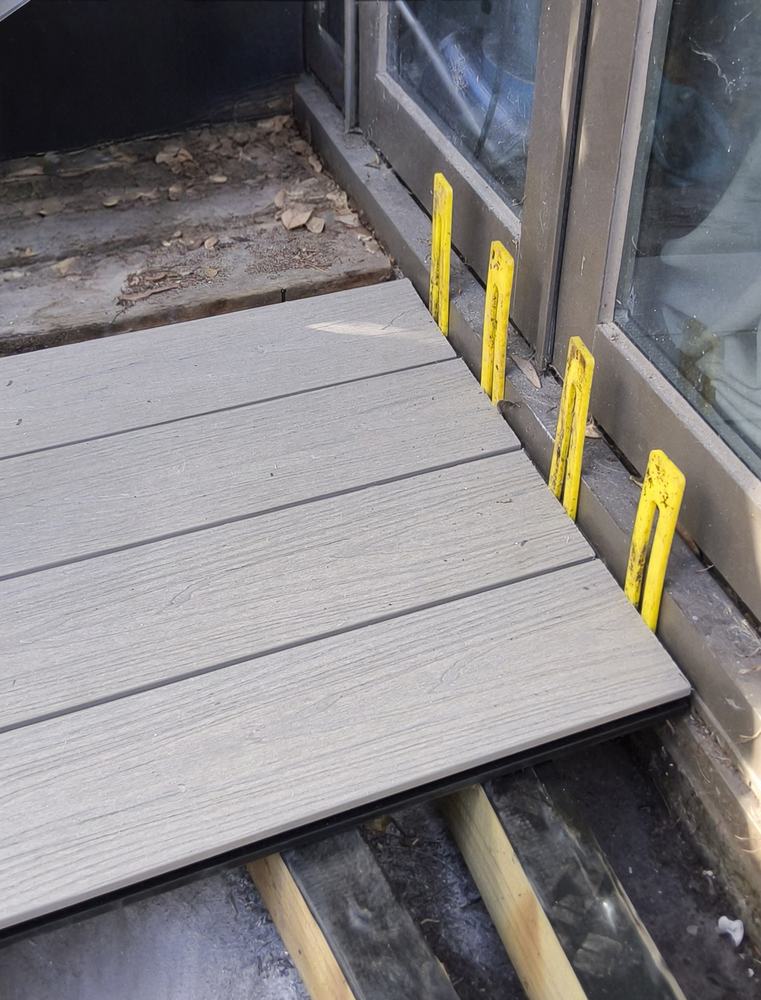
The first boards going down at the door, flush with the step. The yellow packers are 5mm spacers. They hold a consistent gap between the deck and the house so the boards have room to move with the seasons.
16
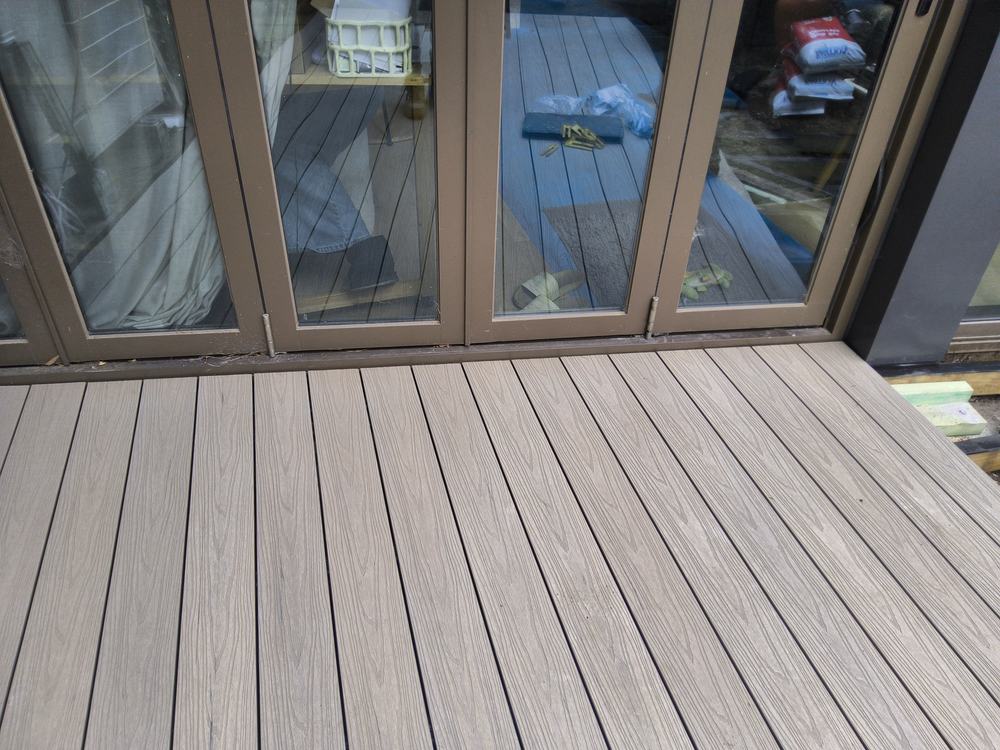
The board layout was calculated before the first board went down, so the deck finishes with a full-width board sitting right against the black door frame on the right. There's no board ripped down to fit and no thin sliver at the edge, just straight lines and even gaps up to the glass.
17
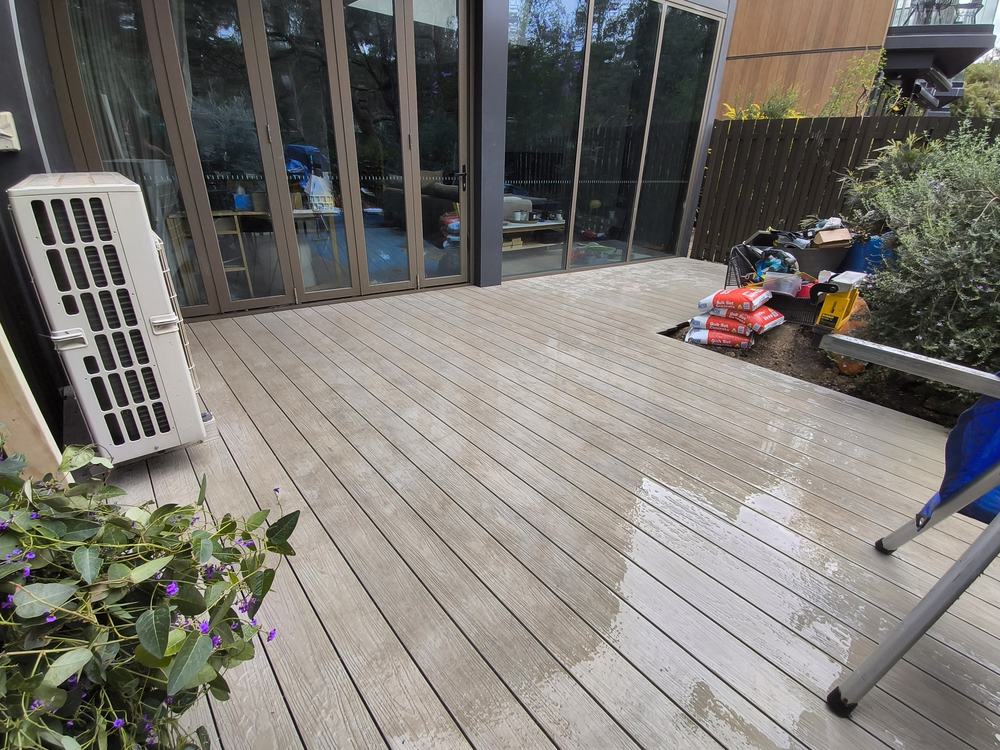
The main deck boarded out: one continuous surface from the house into the extension. The boards, fascias and clips are all from our supplier Composite Wood. Every board is held down with their metal clips, which let the deck expand and contract with temperature.
Stage 6
Clean Edges, Fascia & Lighting
18
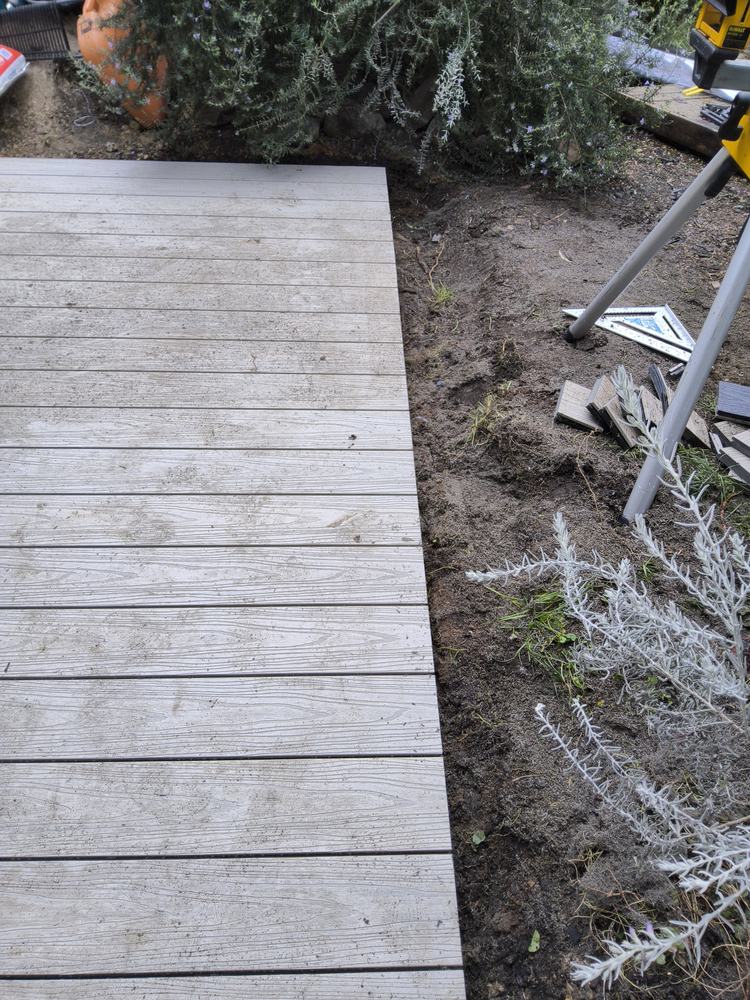
Board ends finished in one clean, straight line. The track saw cuts every board to exactly the same length, so the edge reads as a single line from end to end.
19
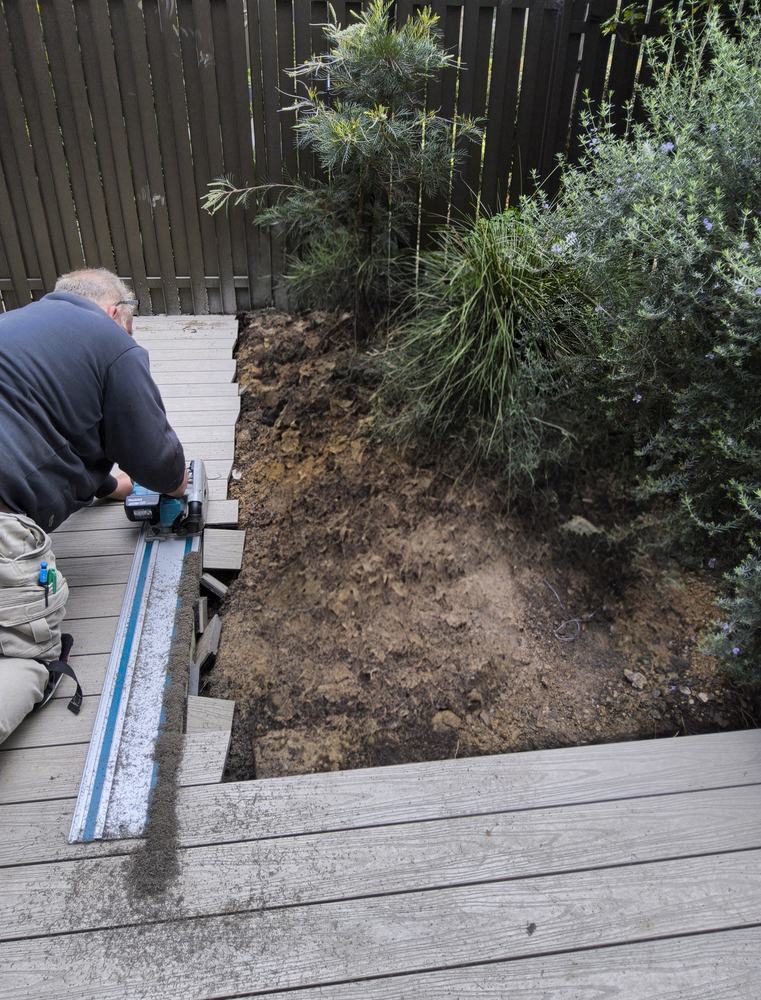
The track saw in action. Running along a fixed guide rail, it cuts through every board end in one dead-straight pass. Composite Wood fascia boards then went on around three sides of the deck, hiding the frame completely.
20
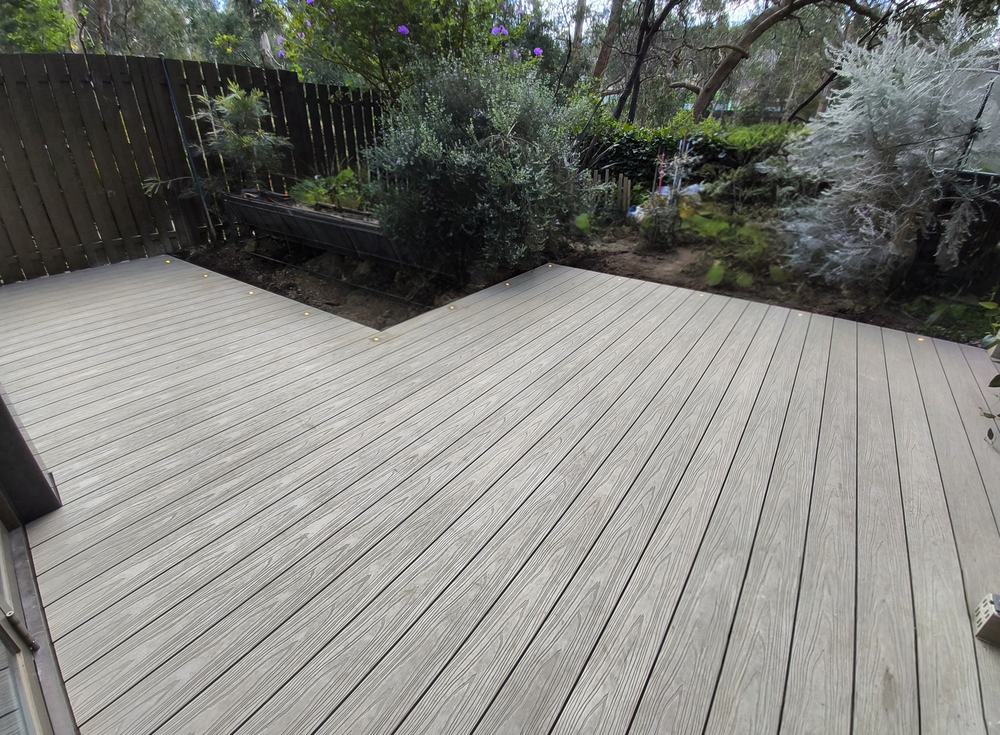
Deck lights installed into the boards, tying the deck into the garden after dark.
Stage 7
The Finished Deck
21
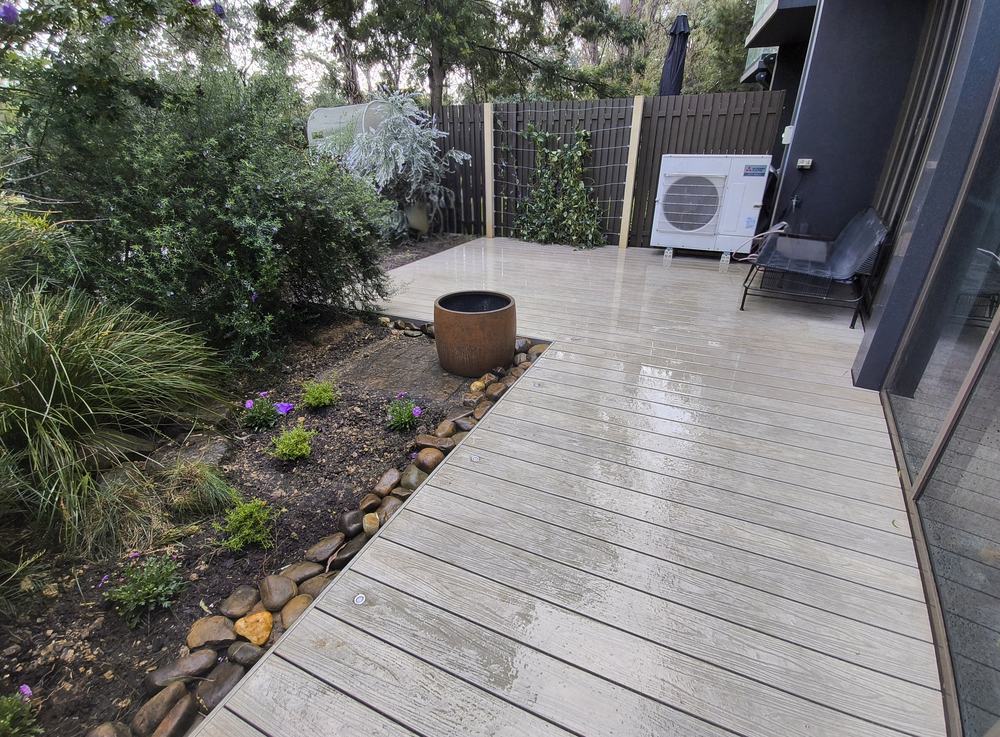
The completed deck along the side of the house. The garden bed is kept, the edge is clean and the lights sit flush in the boards.
22
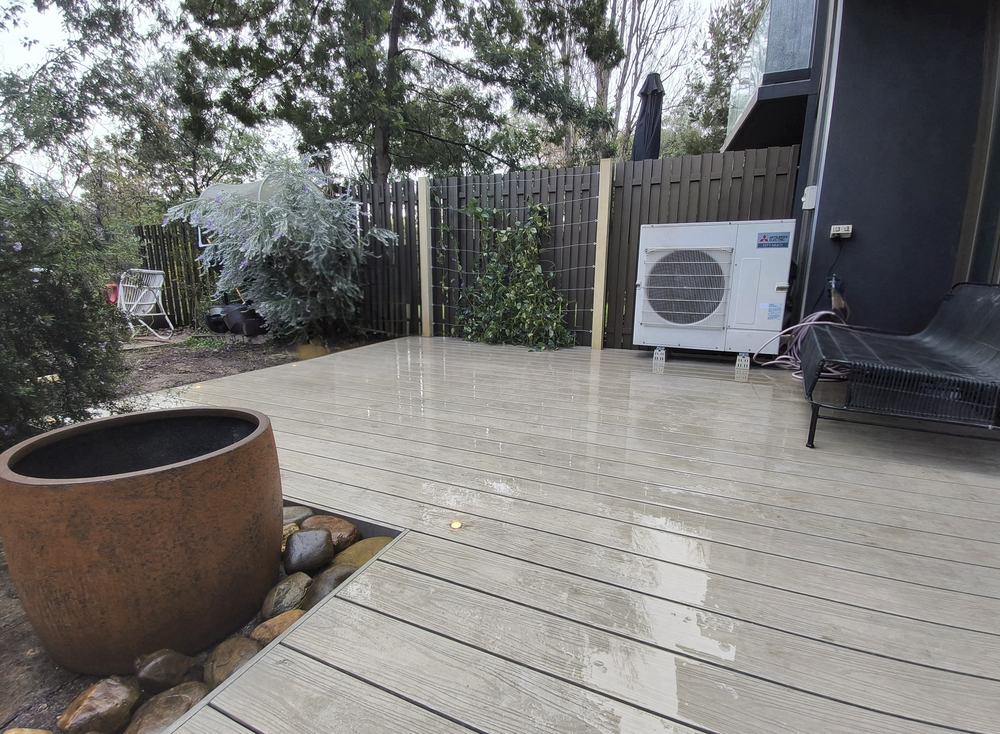
The trellis at the back fence: two cypress posts, each set in its own concreted stump hole, screwed to the joists and cut to fence height, with 8 trellis wires strung between them. The Hardenbergia is already finding the wire, and over time it will fill in as a green wall.
23
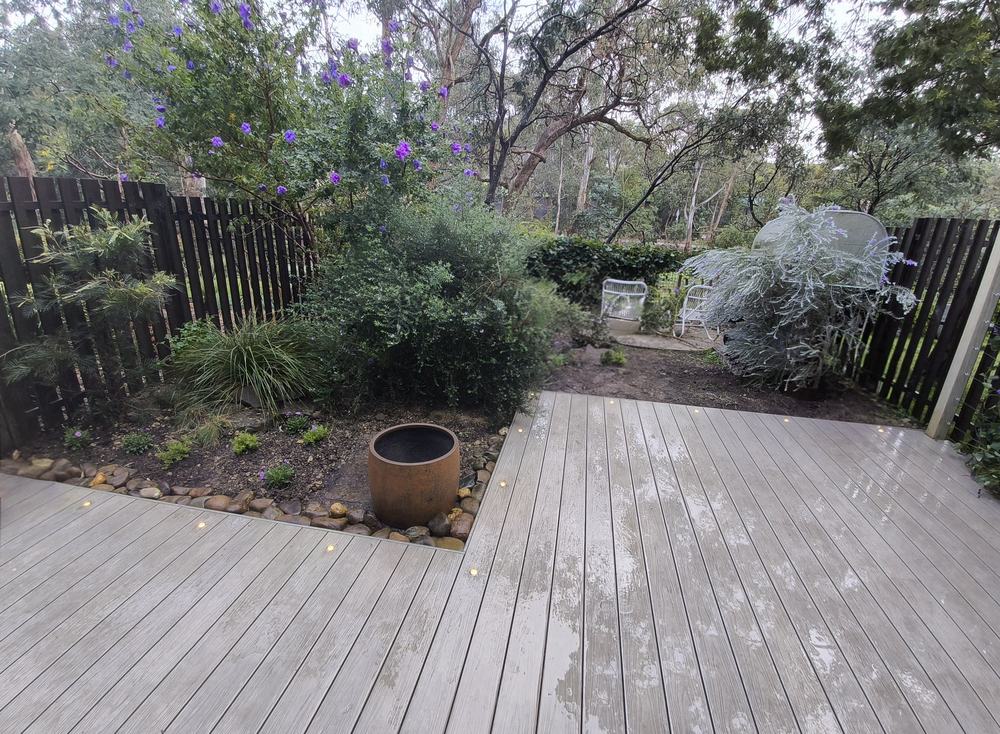
The balance the client was after. The extension gives her real space to use, and the garden still wraps around the deck.
24
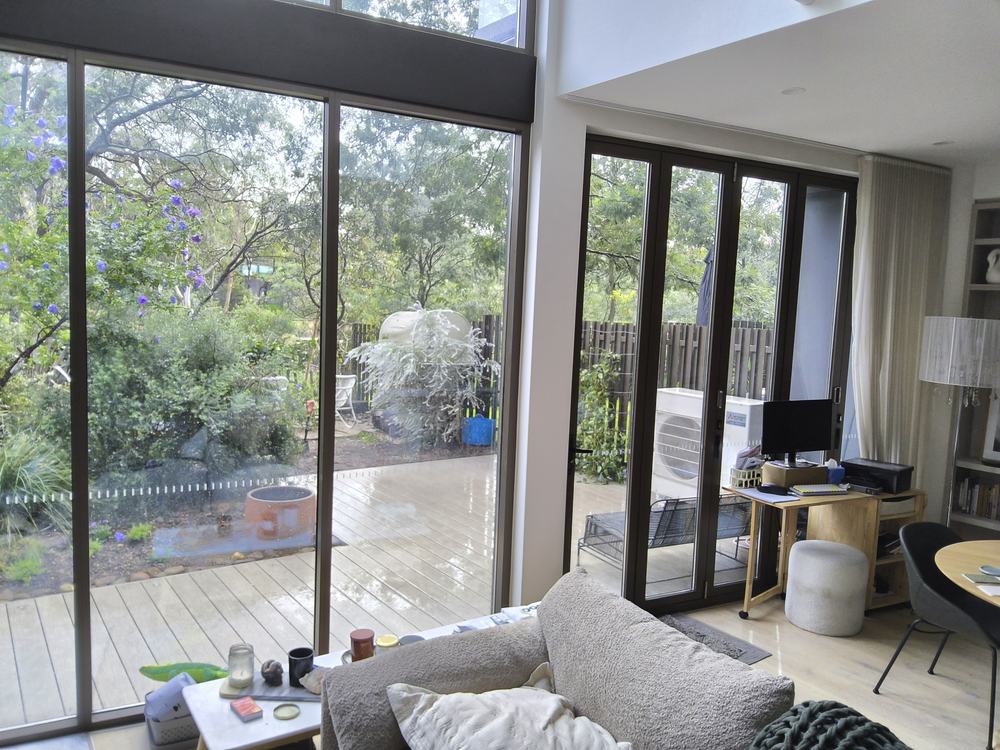
The view from inside: the new deck carries straight out from the living room, level with the door step.